How do I conduct a Seating Assessment? Could my patient (or family member) benefit from improved clinical seating? How do I know which chair my client needs?
These are some of the most frequent questions we get asked at Seating Matters.
More specifically, how to assess the posture and seating needs of a client, patient, or family member.
The key requirement of a seating assessment is simple: it’s ‘hands on’. This isn’t a time to sit back and observe.
Why is a Seating Assessment so important?
Assessment is key to finding the correct seating solution.
Poor assessment = poor solution.
More specifically, an inaccurate or limited assessment can lead to:
- Progression of an existing deviant posture
- Development of a new deviant posture
- Inefficient use of resources
- Costs to both the patient and the organisation
How do I conduct a Seating Assessment?
The easy answer? Let us do it for you.
Seating Assessments are conducted by our trained Seating Matters Seating Specialists at a time and place that works for you. These assessments are complimentary, with no obligation to hire or purchase a Seating Matters chair. One of our Seating Specialists will assess the patient’s seating and postural needs, then offer a recommended seating solution.
Key Guidelines & Things to Remember
Whether you want to conduct your own seating assessment, or simply be across the detail of what to expect on assessment day, here are some key things to remember.
- Set Goals: Take a holistic approach to patient care. Write down what you, the patient and their caregivers want to achieve, and prioritise these goals to manage expectations.
- Photos: Take before and after photos where possible.
- Fixed vs. Flexible Posture: Always identify whether a specific posture is fixed, partially correctible or flexible (fully correctible)? Remember: Correct a flexible posture, but NEVER try to correct a fixed posture.
- Symptom vs. Cause: Don’t focus on the symptom, but rather aim to identify the root cause of a problem.
Questions to Ask
What To Ask/Observe
How long does the patient sit for on a daily basis?
What are the problems or concerns with their existing chair?
What is the age and condition of their current seating surface?
What other chairs have they tried? What are the problems with those chairs?
Does the patient have any pressure injuries (previous/current)? Remember to observe skin integrity – don’t just ask the question.
Transfers & Repositioning
Is the patient still mobile? Are they safe to mobilise?
How many transfers are made per day?
What is the patient’s repositioning schedule? How often?
Functional Considerations
What activities will be undertaken in the chair?
What are the patient and caregiver’s key goals? Prioritise these.
Does the chair need to be powered or manual?
Any further safety considerations?
The 3 Stages of a Seating Assessment
A Seating Assessment is always conducted in 3 stages. These involve both a hands-on assessment and observation while the patient is:
- Sitting in their existing chair: Consider how the patient presents in their existing chair. Identify any problems and note their posture, but don’t try to correct it at this stage. Take photographs where possible. Remember to consider the time of day.
- Lying supine on a flat surface: Determine whether any deformities in posture are correctible and consider whether a desired position can be achieved without resistance.
- Sitting (unsupported) on a flat level surface: This assessment needs to be conducted on a firm surface where the knees and feet are supported. Observe the patient’s posture, balance and weight distribution in this position. Consider whether they are sitting independently, whether they need assistance, or whether they are fully dependent.
Process for Each Stage
Seating Assessments should follow the same structure at every stage: Pelvis, Trunk, Lower Limbs, Upper Limbs, Head & Neck. Here are some points to remember.
Pelvis
- Always start at the pelvis. It is essential to get the position of the pelvis right as this influences the position of the body above and below.
- Locate the ASIS (anterior superior iliac spine) & PSIS (posterior superior iliac spine)
- Consider: pelvic obliquity, pelvis rotation, anterior pelvis tilt, posterior pelvis tilt
- Ask the question: is it fixed, partially correctible, or flexible? Remember to accommodate fixed posture and correct flexible posture.
Trunk
- Look for scoliosis – is it concave to the left or to the right? Is there a secondary scoliosis?
- Consider: lordosis, kyphosis, trunk rotation & shoulder position
- Ask the question: how much manipulation is needed to achieve a desired position?
Lower Limbs
- Hip Flexion: Hip flexion influences the position of the pelvis. If incorrect or not accommodated, it can cause pelvic tilt and obliquity. When lying supine, hip flexion should be tested with the knee bent, until the hips begin to rotate. Relevance to seating: Hip flexion will help determine the back to seat angle i.e. amount of recline required
- Hip Adduction & Abduction: Hip adduction and abduction will influence the position of the pelvis. Any restriction will need to be accommodated to prevent destructive postural tendencies.
- Knees: Hamstring range influences the position of the pelvis and may cause tilt or rotation if not properly accommodated. Consider flexion and extension of the knees, and the impact of elongation on the hips. Relevance to seating: This will determine where the calf pad and footplate should be set.
- Ankles: Consider ankle plantar flexion and dorsiflexion (with hip and knee flexed)
Head & Neck
- Always look at the head and neck from both a side view and front view
- Cervical Flexion/Extension: Is this neutral, in flexion, in extension, or in hyperextension? Is it fixed, partially flexible, or flexible? This is a key consideration for visual field and feeding position.
- Neck Position: Is it midline, in lateral flexion, or is there rotation above the head? Is it fixed, partially flexible, or flexible?
- Head Control: Does the patient have independent head control (full range of movement), restricted head control (restricted ROM), or absent head control?
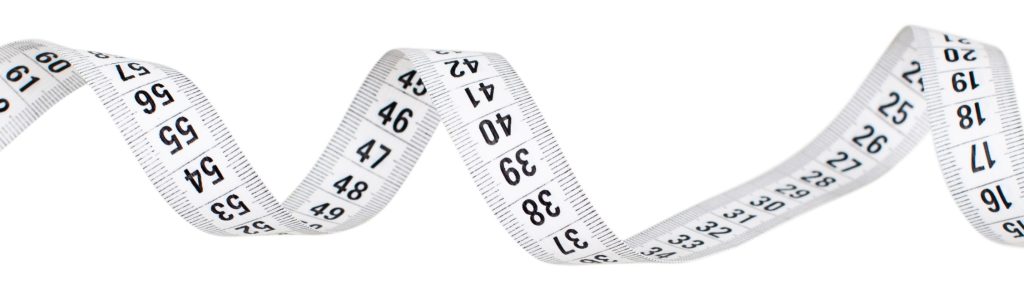
Next Step: Taking Measurements
After an initial Seating Assessment is complete, the next step is to take correct anatomical measurement of the patient. These measurements should be taken on a firm surface, in the correct position, and with the help of another person.
Remember that all Seating Matters chairs are custom made for the individual patient.